Uvlack refers to UV-curable coatings, varnishes, or lacquers that harden almost instantly when exposed to ultraviolet light. Instead of drying through evaporation like traditional coatings, Uvlack cures through photopolymerization, meaning it becomes a solid film within seconds.
- Why Uvlack Problems Happen (The Root Cause Framework)
- 1. Uvlack Feels Sticky or Tacky After Curing
- Orange Peel Texture (Rough, Bumpy Finish)
- Poor Adhesion (Peeling, Flaking, Chipping)
- Fish Eyes / Craters (Small Circular Defects)
- Pinholes / Bubbles
- Yellowing or Discoloration
- Gloss Inconsistency (Patchy Shine or Dull Spots)
Because many Uvlack formulations can be 100% solids, they often reduce or eliminate solvent evaporation and can significantly lower VOC-related compliance burdens compared to conventional coating systems.
Uvlack is widely used in:
- Furniture and wood finishing
- Packaging and printing
- Electronics
- Automotive components
- Industrial metal and plastic parts
Its appeal is simple: speed + durability + aesthetics + sustainability.
Why Uvlack Problems Happen (The Root Cause Framework)
Most Uvlack defects come from one of these three issues:
1) Material Problems
If the coating chemistry isn’t matched to the substrate or UV lamp spectrum, curing becomes unpredictable.
2) Application Problems
Coating thickness, temperature, viscosity, and leveling behavior determine whether Uvlack cures smooth — or fails.
3) Cure Problems
UV curing is fast, but it’s also unforgiving: wrong lamp intensity, incorrect wavelength, oxygen inhibition, or underexposure can leave coatings tacky, brittle, or inconsistent.
A helpful way to think about it:
Bad Uvlack results rarely come from one mistake — they come from small mismatches across the whole process.
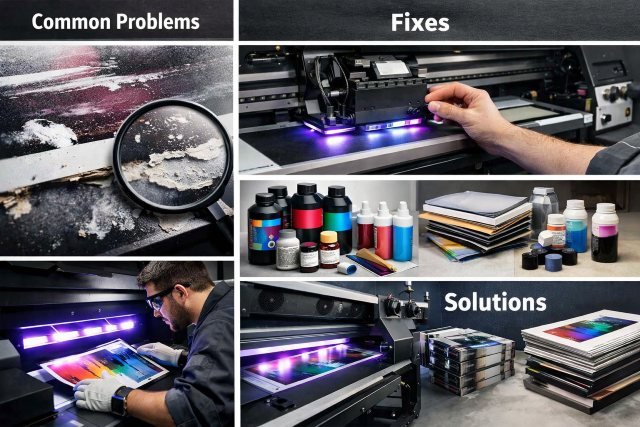
Top Uvlack Problems, Fixes, and Real Solutions
Below are the most common Uvlack coating problems people face — and how to solve them permanently.
1. Uvlack Feels Sticky or Tacky After Curing
What it looks like
The surface feels soft, slightly wet, or sticky — even after UV exposure. Dust sticks easily and the coating never feels “finished.”
Why it happens
This is usually caused by undercure. The coating polymerizes partially but never fully crosslinks. Common triggers include:
- Insufficient UV dose (intensity or time)
- Lamp wavelength mismatch
- Oxygen inhibition at the surface (very common)
- Excessive film thickness
- Incorrect photoinitiator system
Fixes that work
- Increase UV dose: either slow the line speed or increase intensity.
- Switch to a photoinitiator better matched to UVA/UVB output.
- Use inerting (nitrogen) where oxygen inhibition is severe.
- Apply thinner coats and cure in multiple passes.
- Add a post-cure step (some systems benefit from combined UVA + UVC LED to improve surface cure).
Pro tip: If the coating is tacky only on the top surface but hard underneath, oxygen inhibition is the #1 suspect.
Orange Peel Texture (Rough, Bumpy Finish)
What it looks like
The coating cures with a textured “citrus peel” surface instead of leveling smooth.
Why it happens
Orange peel typically results from:
- High viscosity
- Poor flow and leveling
- Wrong temperature (too cold increases viscosity)
- Spray application issues (droplet size)
- Improper cure conditions
Fixes
- Reduce viscosity slightly (only as recommended by the supplier).
- Warm the substrate and coating to improve leveling.
- Use flow additives designed for UV coatings.
- Adjust spray setup: atomization pressure, distance, overlap, and gun speed.
- Verify cure isn’t happening too fast before leveling completes.
Quick diagnostic:
If orange peel worsens when you increase UV intensity, curing may be “locking” texture before the coating levels.
Poor Adhesion (Peeling, Flaking, Chipping)
What it looks like
Uvlack cures, but later peels off in sheets, chips easily, or fails tape tests.
Why it happens
Most adhesion failures come from surface prep:
- Oils, dust, silicone, or moisture contamination
- Low surface energy plastics (PP/PE)
- Incorrect primer choice
- Over-cure causing brittleness and poor bonding
Fixes
- Improve cleaning: degreasing + proper drying.
- Use surface activation: flame, corona, or plasma for plastics.
- Apply a compatible UV primer or adhesion promoter.
- Confirm coating is not over-cured (brittle films can delaminate under stress).
Real-world scenario:
Wood panels stored in humid areas often create moisture-based adhesion failures. Even if they look dry, trapped moisture can erupt as peeling later.
Fish Eyes / Craters (Small Circular Defects)
What it looks like
Tiny circular “holes” form where the coating pulls away.
Why it happens
Fish eyes are almost always caused by surface contamination, especially:
- Silicone
- Oil mist
- Grease
- Residual cleaners not fully evaporated
Fixes
- Identify contamination source (compressed air lines are a common culprit).
- Use oil separators and filters in air systems.
- Switch to silicone-free cleaners.
- Consider adding wetting agents designed for UV coatings.
Pro tip:
If fish eyes occur randomly, your contamination is airborne — not on the substrate.
Pinholes / Bubbles
What it looks like
Small holes or trapped bubbles appear after curing.
Why it happens
Usually from:
- Moisture trapped in substrate
- Air entrapment from application
- Solvent flashing too fast (for hybrid systems)
- Cure happening before bubbles escape
Fixes
- Pre-dry porous substrates like wood.
- Apply thinner layers.
- Reduce shear during mixing.
- Introduce a short “flash” or leveling time before UV cure.
- Adjust line speed so the coating can release entrapped air.
Best practice:
For porous wood, sealing coats reduce pinholes dramatically.
Yellowing or Discoloration
What it looks like
Clear coats become yellowish, especially on whites or light finishes.
Why it happens
- Photoinitiator discoloration
- Overexposure to UV or excessive heat
- Poor UV stabilizer package
- Substrate chemistry reaction (common with some plastics)
Fixes
- Use non-yellowing photoinitiators and stabilizers.
- Reduce thermal buildup with LED UV lamps (cooler curing).
- Avoid excessive UV dose beyond supplier recommendations.
- Use UV absorbers and HALS additives (when needed).
Gloss Inconsistency (Patchy Shine or Dull Spots)
What it looks like
Some areas are glossy while others appear dull or hazy.
Why it happens
This often signals:
- Uneven coating thickness
- Uneven UV exposure (lamp aging or reflector contamination)
- Inconsistent substrate absorption
- Cure inhibition in certain zones
Fixes
- Calibrate application: ensure uniform film build.
- Clean reflectors and replace aging bulbs.
- Check irradiance across belt width (profiling matters).
- Ensure substrate is sealed or consistent in porosity.
Advanced tip:
Use radiometers to verify UVA dose delivery — “lamp on” doesn’t mean “lamp effective.”
Uvlack Troubleshooting Checklist
When Uvlack problems show up, don’t guess. Follow this order:
- Check substrate cleanliness and surface energy
- Measure wet film thickness
- Verify viscosity and temperature
- Confirm UV dose (intensity + exposure time)
- Match photoinitiator to lamp type (mercury vs LED)
- Evaluate oxygen inhibition risks
- Run a controlled test panel using one change at a time
This is exactly how high-performing manufacturing lines maintain consistent UV cure quality shift after shift.
The Sustainability Side of Uvlack
Uvlack is often positioned as a greener alternative, and the science supports it:
- UV curing can be solvent-free, reducing VOC emissions.
- It uses less floor space and avoids long thermal ovens.
- Cure times can be under two seconds, boosting efficiency and lowering energy use.
Academic reviews on radiation curing highlight how UV systems reduce solvents and enable rapid curing compared to traditional coatings.
That said, it’s important to remain realistic: UV systems still require proper formulation, lamp matching, and safe handling protocols to deliver these benefits consistently.
FAQ: Uvlack Common Questions
Is Uvlack the same as UV lacquer?
Yes. In most contexts, Uvlack is used as a shorthand term for UV lacquer / UV-curable coating systems, especially in furniture, industrial finishing, and printing.
Why does my Uvlack stay sticky even after curing?
Most often, it’s due to undercure or oxygen inhibition. Increase UV dose, reduce film thickness, and confirm your photoinitiator matches your lamp type.
Can you over-cure Uvlack?
Yes. Over-curing can cause brittleness, cracking, and adhesion failure over time — especially on flexible substrates.
What’s the most common Uvlack defect?
In real-world manufacturing, the most frequent issues are:
- Tackiness (undercure)
- Orange peel
- Poor adhesion from contamination
These show up because UV curing is process-sensitive and requires tight controls.
Does Uvlack reduce VOC emissions?
Many Uvlack systems are designed as 100% solids, meaning no solvent evaporation and significantly fewer VOC-related burdens compared to solvent-based coatings.
Conclusion: How to Get Perfect Results with Uvlack
If you’re using Uvlack, you’re working with one of the fastest and most durable coating technologies available today. But the same speed that makes it powerful also makes it sensitive — meaning small mistakes can cause big defects.
The most reliable way to prevent Uvlack failures is to treat it like a controlled system:
match your formulation to your UV lamp, apply consistent film thickness, maintain surface cleanliness, and verify UV dose with real measurement tools.
When you do that, Uvlack delivers what it promises: beautiful finishes, rapid throughput, and long-lasting protection — with the added advantage of potentially reduced VOC impact compared to traditional coatings.