If you’re searching for How to Install a Garburator, you’re probably aiming for two things: a clean, leak-free install and a disposal that runs quietly without tripping breakers or shaking your sink. The good news is that most standard garburator (garbage disposal) installs are very doable for a careful DIYer — especially if you take your time on the mounting assembly, electrical safety, and drain alignment.
- What is a garburator (and why installation details matter)
- Before you start: compatibility checks that prevent 80% of headaches
- Tools and materials you’ll actually use (and what people forget)
- How to Install a Garburator safely: shutoffs, power, and workspace
- Step-by-step: How to Install a Garburator (new install or replacement)
- First test: how to catch leaks and vibration before you celebrate
- Common mistakes (and how to avoid them)
- Real-world scenario: replacement that “should have been easy” (but wasn’t)
- Maintenance tips that keep your new install smooth
- FAQs
- Conclusion: How to Install a Garburator without leaks, noise, or regrets
A “smooth” install isn’t about rushing. It’s about preparing the sink flange correctly, supporting the unit during mounting, and testing methodically so you catch a tiny drip before it becomes cabinet damage. This guide walks you through the full process with real-world tips, plus the most common mistakes that lead to leaks, humming, or poor drainage.
What is a garburator (and why installation details matter)
A garburator is the Canadian/common term for a garbage disposal. It grinds food scraps into small particles that flow out with water through your kitchen drain line. That sounds simple, but the disposal sits at a high-stress intersection of plumbing vibration, water seals, and electrical power — so small install errors show up fast.
Most “new install” problems come from:
- an uneven sink flange seal (slow leak),
- a misaligned discharge tube (drain backups or vibration),
- loose mounting lugs (rattling),
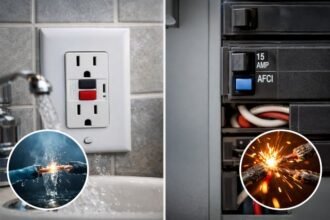
- or incorrect electrical/GFCI setup (nuisance trips or unsafe wiring).
Newer disposer designs also try to simplify installation with updated mount/connection systems (for example, InSinkErator highlights easier connection options and mounting features in its installation support guidance).
Before you start: compatibility checks that prevent 80% of headaches
Sink and drain compatibility
Most garburators fit a standard 3.5-inch sink drain opening, which is common on kitchen sinks. If you’re replacing an old unit, you’re usually fine. If you’re adding one for the first time or upgrading the sink, confirm that the drain opening and sink thickness are within your unit’s supported range. Manufacturer installation manuals often call out thickness limits and special screw requirements for thicker sinks.
Dishwasher connection: yes or no?
If you have a dishwasher, many setups route dishwasher discharge into the garburator. That requires a dishwasher inlet on the disposal and removal of the knockout plug (varies by model). Installation manuals typically include this step and warn about proper preparation.
Electrical: plug-in vs hardwired
Some disposals are cord-and-plug; others are hardwired (or can be either with an adapter/cord kit). If your under-sink cabinet has an outlet, corded is usually easiest. If not, hardwiring may be needed — often best handled by an electrician depending on local code.
Also, GFCI protection in kitchens has expanded in recent code cycles, and industry guidance notes that more kitchen receptacles — including those serving appliances like disposals — may require GFCI protection.
Because code requirements vary by country/province/state and by your home’s build date, treat this as a “verify locally” item, not a universal rule.
Tools and materials you’ll actually use (and what people forget)
Here’s the practical reality: the hardest part isn’t “tools,” it’s having the right sealing and alignment supplies so you don’t redo work.
Commonly needed:
- Adjustable wrench / channel-lock pliers
- Screwdrivers (Phillips + flathead)
- Plumber’s putty (or the manufacturer’s recommended sealant)
- Pipe fittings as needed (trap adapter, extension, dishwasher hose clamp)
- Electrical tester (non-contact voltage tester)
- Bucket and towels (you will spill some water)
Two things people forget:
- A stable way to support the unit while mounting (a small box or stack of wood under it helps).
- A fresh slip-joint washer if you’re disturbing older drain fittings (old washers love to leak after reassembly).
How to Install a Garburator safely: shutoffs, power, and workspace
Step 1: Cut the power properly
Turn off the breaker that feeds the disposal circuit. Don’t trust the switch alone. Verify power is off with a tester before touching wires.
If your unit plugs into an outlet under the sink, unplug it after switching off the breaker anyway (double safety).
Step 2: Clear the cabinet and protect surfaces
Remove everything under the sink. Put down towels. Set a bucket under the P-trap because it will hold water.
Step 3: Turn off water (optional, but smart)
You don’t always need to shut off water to install a disposal, but it’s safer if you’re clumsy around the shutoff valves or you’re replacing faucet/supply lines at the same time. If you leave water on, just don’t bump the faucet and flood your workspace.
Step-by-step: How to Install a Garburator (new install or replacement)
Step 4: Remove the old garburator (replacement scenario)
If you’re replacing:
- Disconnect power (unplug or open the wiring compartment after verifying power is off).
- Disconnect the dishwasher hose (if attached).
- Loosen the mounting ring and rotate the disposer to release it from the sink mount.
- Remove the discharge tube and set aside.
If you’re installing for the first time, skip to sink flange installation.
Step 5: Remove the old sink flange and clean the opening
This step determines whether you’ll have leaks.
Scrape away old putty, silicone, and grime from the sink drain opening. Manufacturer manuals explicitly call out cleaning old putty before installing the new disposer mount.
Wipe clean and dry. A slightly dirty surface can create a tiny leak path that only shows up after a few days.
Step 6: Install the sink flange with an even seal
Most installations use plumber’s putty under the sink flange unless the manufacturer specifies otherwise.
The goal: a continuous seal with no gaps.
Press the flange down firmly from above while you assemble the gasket and mounting hardware from below. Tighten evenly. Don’t crank one side fully tight first — go around in turns so the flange seats flat.
Pro tip: If you see putty squeeze out evenly around the flange lip, that’s a good sign you have uniform pressure.
Step 7: Assemble the mounting ring and lock system
Different brands have different mounting hardware, but the concept is the same:
- upper gasket sits against the sink bottom,
- mounting ring clamps the flange assembly,
- snap ring/retainer holds parts in place,
- the disposal twists into the mount.
This is where smooth installs happen: align everything carefully before tightening. If the mounting ring is crooked, the disposal may feel impossible to twist-lock later.
Step 8: Prepare the disposal: discharge tube and dishwasher inlet
Attach the discharge tube/elbow to the disposer outlet with the gasket provided.
If connecting a dishwasher:
- Knock out the dishwasher inlet plug (per instructions), and remove the loose plug piece from inside the unit (don’t skip this).
- Attach the dishwasher hose with a clamp.
Manuals commonly include a dedicated step for dishwasher inlet preparation and warn about proper setup.
Step 9: Electrical connection (corded or hardwired)
For corded disposals: attach the cord kit if it’s not pre-installed, then plug into the under-sink receptacle after everything is mounted and plumbing is connected.
For hardwired: connect hot/neutral/ground exactly as required in the wiring compartment, secure the strain relief, and close the cover plate.
Important: kitchen electrical safety is not the place to “wing it.” If you’re uncertain about GFCI/AFCI, dedicated circuits, or local rules, consult a licensed electrician. Code guidance and industry summaries note that GFCI requirements for kitchen receptacles have become broader in recent NEC editions.
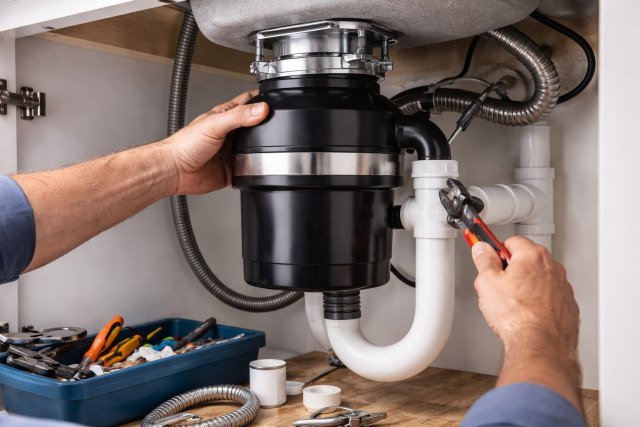
Step 10: Mount the garburator: the easiest way to avoid frustration
This is the moment people hate — because the unit is heavy and awkward.
Do this instead:
- Place a sturdy box or stack of wood under the unit to hold it near the sink mount height.
- Lift slightly and align the tabs/lugs.
- Twist-lock according to your mount design until it seats.
If you feel like you’re fighting it, stop and check alignment. Forcing it can bend parts or damage the gasket.
Step 11: Connect the drain line and P-trap with proper alignment
Now connect the disposal discharge tube to your drain trap.
A smooth install is all about alignment:
- The trap should meet the discharge tube without being pulled sideways.
- If you need to “force” the pipe into place, you’ll usually get leaks later.
If the new disposal outlet sits higher/lower than the old one, you may need an extension tube or a different trap configuration.
Step 12: Final tightening and leak prevention pass
Tighten slip-joint nuts snugly, then an extra small turn. Over-tightening can deform washers and cause leaks.
Wipe everything dry before testing so you can spot fresh moisture.
First test: how to catch leaks and vibration before you celebrate
Water test (before power)
Run cold water and fill the sink partway, then let it drain while watching every joint:
- sink flange area,
- mounting assembly (drips can track along surfaces),
- discharge tube connection,
- trap slip joints,
- dishwasher hose connection (if used).
If you see moisture, tighten gently and re-check.
Power test
Once you confirm no leaks, restore power and test the unit with running water.
If the unit hums but doesn’t spin, it may be jammed or the internal overload protector has tripped.
InSinkErator’s support guidance for jammed disposals describes using the supplied wrench (or a 1/4-inch Allen wrench) to free the unit and then resetting it.
Common mistakes (and how to avoid them)
Mistake 1: Uneven putty seal under the sink flange
Symptom: slow leak that appears days later.
Fix: remove and re-seat the flange with a clean surface and an even seal.
Mistake 2: Misaligned trap that “pulls” on the disposal outlet
Symptom: joint leaks, vibration noise, or slow drain.
Fix: adjust pipe lengths and angles so everything meets naturally.
Mistake 3: Forgetting the dishwasher knockout plug removal
Symptom: dishwasher backs up into the sink.
Fix: remove plug and clear it from inside the disposer.
Mistake 4: Ignoring GFCI/AFCI realities
Symptom: nuisance trips or unsafe setup.
Fix: verify local requirements and appliance instructions; kitchen receptacle protection rules have expanded in recent code cycles.
Real-world scenario: replacement that “should have been easy” (but wasn’t)
A very common situation: you replace a 10-year-old garburator with a newer model, reuse the old trap, and suddenly it leaks.
What happened?
- The new disposer outlet height is slightly different.
- The old trap was “barely” aligned before.
- Old washers are stiff and don’t reseal well after being disturbed.
The smooth fix is usually boring: replace a couple washers, add a small extension piece, and align the trap without tension. You’ll spend 20 extra minutes and save weeks of cabinet-floor irritation.
Maintenance tips that keep your new install smooth
Run cold water during grinding and for a few seconds after to flush particles through. If you ever get a jam or humming, follow the manufacturer’s jam-clearing steps rather than forcing tools into the chamber.
If you want a bigger picture of why reducing food waste matters, EPA resources emphasize prevention first and outline pathways for managing wasted food, including environmental impacts.
A garburator can be convenient, but it’s still smart to avoid sending large volumes of food waste down the drain if your local system isn’t designed for it.
FAQs
How long does it take to install a garburator?
A straightforward replacement typically takes 1–2 hours if the existing mount and plumbing align well. First-time installs can take longer if you need to add an outlet, modify plumbing, or connect a dishwasher line.
Do I need a plumber to install a garburator?
Not always. Many homeowners can install a garburator safely if they’re comfortable with basic plumbing and can correctly handle the electrical connection. If you need new wiring, are unsure about GFCI requirements, or your drain line needs modification, hiring a pro is often worth it.
Does a garburator need GFCI protection?
In many jurisdictions, kitchen receptacles and cord-and-plug-connected appliances may require GFCI protection depending on the code edition and location. Industry summaries of recent NEC changes specifically note expanded GFCI scope for kitchen receptacles, including those serving appliances like disposals.
Always verify your local rules.
Why is my new garburator humming but not spinning?
A humming sound often indicates a jam or the unit can’t rotate freely. Manufacturer guidance commonly recommends using the supplied wrench (or a 1/4-inch Allen wrench) to free the rotor and then pressing the reset button if needed.
What should I never put in a garburator?
Grease, large bones, fibrous foods (like corn husks), and starchy peels can cause clogs or buildup. When in doubt, compost or trash it — especially if your plumbing is older or prone to slow drains.
Conclusion: How to Install a Garburator without leaks, noise, or regrets
If you take away one thing from this How to Install a Garburator guide, let it be this: most “bad installs” aren’t dramatic failures — they’re tiny alignment and sealing issues that show up as slow leaks, vibration, or a unit that trips protection devices. Focus on a clean sink opening, an even flange seal, a stress-free drain alignment, and a safe electrical connection that matches local requirements. Code guidance around kitchen receptacle protection has evolved over recent cycles, so verifying GFCI/AFCI expectations where you live is part of doing it right.