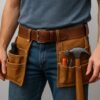
Installing cabinets requires precision, accuracy, and the right equipment. Whether you’re a contractor or a DIY renovator, having the best Cabinet Installation Tools can make the difference between a flawless fit and a frustrating job. In this comprehensive guide, you’ll learn which tools professionals rely on, what each tool does, and how they help ensure perfectly aligned and secure cabinets.
- 1. Laser Level (Absolute Essential Tool)
- 2. Power Drill and Driver Set
- 3. Stud Finder (High Accuracy)
- 4. Clamps (Cabinet Face Frame Clamps)
- 5. Shims
- 6. Cabinet Jack / Cabinet Lifter
- 7. Tape Measure (25 ft Minimum)
- 8. Impact Driver
- 9. Hole Saw Kit
- 10. Pry Bar
- 11. Carpenter’s Square & Speed Square
- 12. Safety Gear
- 1. Accuracy
- 2. Durability
- 3. Ergonomics
- 4. Compatibility
- 5. Budget
The right set of tools not only improves accuracy but also cuts labor time and prevents costly mistakes. According to the National Kitchen and Bath Association (NKBA), proper tool usage can improve installation accuracy by up to 30%, making tool selection essential for top-quality results.
What Are the Essential Cabinet Installation Tools?
Before diving into detailed reviews, here’s a quick overview of the must-have Cabinet Installation Tools every installer should own.
Core Tools for Every Cabinet Installation
- Power drill/driver
- Stud finder
- Laser level
- Clamps
- Shims
- Tape measure
- Impact driver
- Crown molding jig (if needed)
- Cabinet jack or support system
- Hole saw kit
- Pry bar
- Safety gear (gloves, glasses, knee pads)
Top 12 Best Cabinet Installation Tools (Reviewed for 2025)
Below are the most reliable, professional-grade tools used by cabinet installers today.
1. Laser Level (Absolute Essential Tool)
Best For: Cabinet alignment and leveling accuracy
A laser level ensures perfectly straight upper and lower cabinets. Professionals agree it’s one of the most important Cabinet Installation Tools because even a ⅛-inch misalignment can cause noticeable visual flaws.
Recommended Models:
- Bosch GLL3-330CG
- DeWalt DW088K
- Huepar 603CG
Why It’s Essential:
- Precise horizontal leveling
- Ensures consistent installation height
- Ideal for long cabinet runs
2. Power Drill and Driver Set
Best For: Fast drilling and screw installation
No cabinet installation can be completed without a reliable drill and driver combo. You’ll need it to predrill holes, assemble mounting rails, and secure cabinets to studs.
Recommended Models:
- Milwaukee M18 Fuel
- DeWalt 20V Max XR
- Makita LXT Brushless
Pro Tip: Use a clutch setting to avoid stripping soft cabinet materials.
3. Stud Finder (High Accuracy)
Best For: Secure cabinet mounting
Cabinets must be mounted to studs — not drywall. A high-quality stud finder ensures maximum weight support and prevents dangerous installations.
Popular Picks:
- Franklin Sensors ProSensor 710
- Zircon HD70
4. Clamps (Cabinet Face Frame Clamps)
Best For: Holding cabinets together during installation
These clamps allow perfect flush seams between cabinet face frames, making the joints clean and professional.
Why You Need Them:
- Keeps cabinets aligned while driving screws
- Prevents shifting
- Saves time on multi-person installs
5. Shims
Best For: Leveling uneven floors and walls
Shims help compensate for uneven floors, a common issue in older homes.
Types:
- Composite shims
- Hardwood shims
6. Cabinet Jack / Cabinet Lifter
Best For: Single-person upper cabinet installation
A cabinet jack supports heavy upper cabinets and holds them in place while you drill. It’s a game changer for solo installers.
Top Picks:
- FastCap UpperHand
- Cabinetizer 76
7. Tape Measure (25 ft Minimum)
Accurate measurements = perfect fits. Use a high-quality tape measure with a standout of at least 10 feet.
8. Impact Driver
Best For: Driving long cabinet screws into studs
Impact drivers offer better torque and efficiency compared to drills.
9. Hole Saw Kit
Best For: Drilling holes for plumbing and wiring
Necessary when installing sink base cabinets or running appliance wires.
10. Pry Bar
Used for removing old cabinets, molding, and trim while minimizing wall damage.
11. Carpenter’s Square & Speed Square
Ensures accurate angles and straight lines during cabinet installation.
12. Safety Gear
Don’t skip this. Cabinet installers often deal with heavy lifting, power tools, and dust.
Comparison Table: Best Cabinet Installation Tools
| Tool | Purpose | Essential Level | Best For |
|---|---|---|---|
| Laser Level | Alignment | ★★★★★ | Pros & DIYers |
| Drill/Driver | Assembly | ★★★★★ | All installs |
| Stud Finder | Structural support | ★★★★★ | Securing to studs |
| Clamps | Alignment | ★★★★☆ | Face frames |
| Shims | Leveling | ★★★★☆ | Floors/walls |
| Cabinet Jack | Cabinet lifting | ★★★★☆ | Solo installers |
| Hole Saw Kit | Plumbing holes | ★★★☆☆ | Sink bases |
How to Choose the Best Cabinet Installation Tools (Buyer’s Guide)
1. Accuracy
Precise measurements and leveling tools ensure the cabinets line up perfectly.
2. Durability
Choose tools from reputable brands like DeWalt, Milwaukee, Bosch, and Makita.
3. Ergonomics
Comfort matters when lifting heavy cabinets or working long days.
4. Compatibility
Ensure your drill bits, screws, and accessories match your cabinet hardware.
5. Budget
You can build a full cabinet installation kit for anywhere between $250–$1,200, depending on whether you choose pro or budget tools.
Step-by-Step Cabinet Installation Overview (Professional Tips)
- Measure the space and mark stud locations.
- Use a laser level to draw reference lines.
- Install the ledger board for upper cabinets.
- Use a cabinet jack to lift and position the cabinet.
- Clamp adjoining cabinets and secure face frames.
- Install base cabinets next, leveling with shims.
- Secure all cabinets to studs using cabinet screws.
- Add crown molding, filler strips, or toe kick boards.
Real-World Example (Case Study)
A contractor installing cabinets in a 1960s home discovered the floor was off-level by nearly ¾ of an inch. Using shims, a laser level, and alignment clamps, the contractor achieved a perfect install without modifying the cabinetry. The right Cabinet Installation Tools turned a potentially difficult job into a smooth project.
FAQ: Cabinet Installation Tools
What are the most important Cabinet Installation Tools?
The most essential tools include a laser level, drills, stud finder, clamps, shims, cabinet jack, and tape measure.
Do I need a laser level to install cabinets?
Yes. It ensures perfectly straight and level installations, especially for upper cabinets.
Can one person install upper cabinets?
Yes—but only with a cabinet jack or support system to hold cabinets safely in place.
How much do Cabinet Installation Tools cost?
Depending on quality, a full setup costs between $250–$1,200.
What size screws are used for cabinets?
Most installers use 2½ to 3-inch cabinet screws for securing units to wall studs.
Conclusion: Which Cabinet Installation Tools Are Best?
Choosing the right Cabinet Installation Tools is the key to achieving perfect, professional installations. Whether you’re a seasoned contractor or a DIY homeowner, investing in high-quality tools — like a laser level, drill/driver combo, accurate stud finder, clamps, shims, and a cabinet jack — will dramatically improve your accuracy, safety, and efficiency. The right tools don’t just make the job easier — they guarantee consistent, beautiful results every time.