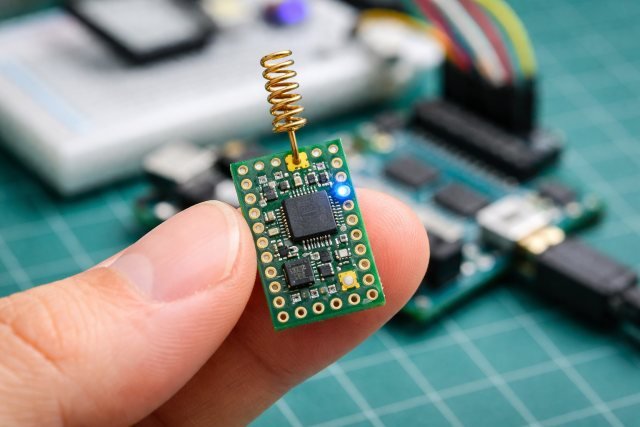
Antennino is a compact, Arduino-compatible development board designed for low-power wireless communication in IoT and remote sensor projects. Its name blends “antenna” and “Arduino,” reflecting the board’s core advantage: it’s an Arduino-like platform that includes an integrated wireless link meant for long-range, low-energy communication — ideal for devices that must run for months (or longer) on a battery.
- Why Antennino Matters in 2025–2026 IoT Projects
- Antennino Features: What Makes It Different?
- Antennino vs ESP32 vs Arduino Uno: Which One Should You Pick?
- How Antennino Works
- Real-World Scenarios Where Antennino Shines
- Antennino Setup Guide (Beginner-Friendly Overview)
- Actionable Low-Power Tips (Make Antennino Last Longer)
- Antennino Gateway + ThingsBoard: A Modern Dashboard Approach
- Common Questions People Ask About Antennino
- Antennino Buying & Project Planning Considerations
- Conclusion: Is Antennino Worth It?
- FAQs
Unlike typical Arduino boards that rely on external wireless shields or higher-power Wi-Fi chips, Antennino integrates radio connectivity using a sub-GHz RF approach (commonly associated with RFM69 modules), along with design choices focused on sleep modes, low idle drain, and reliable telemetry transmission.
If your project goal is “send small data, very reliably, for a long time”, Antennino is built for exactly that.
Why Antennino Matters in 2025–2026 IoT Projects
The modern IoT ecosystem often overuses Wi-Fi for problems that don’t need internet-speed throughput. For example, a farm moisture sensor that sends one reading every 15 minutes doesn’t benefit from Wi-Fi’s complexity and energy cost — but it does suffer from it.
Antennino addresses the gap between:
- cheap microcontroller boards (Arduino Uno, Nano)
and - high-power wireless boards (ESP32, Wi-Fi modules)
by giving makers and engineers a middle path: Arduino simplicity + low-power RF + long-term battery readiness.
This is why Antennino is especially relevant for:
- environmental monitoring
- smart agriculture
- home automation sensors
- off-grid installations
- long-distance telemetry
- building-to-building wireless nodes
Antennino Features: What Makes It Different?
1) Arduino-Compatible Core (ATmega Family)
Antennino is based on an Atmel (now Microchip) microcontroller architecture compatible with the Arduino IDE, making it familiar for anyone who has used classic Arduino boards.
That means you can often reuse Arduino libraries, workflows, and toolchains without needing a specialized compiler or ecosystem.
2) Built-In Wireless Communication via RF (RFM69 Integration)
One of Antennino’s defining characteristics is its integrated radio module capability, frequently described around RFM69 sub-GHz RF communication. The official Antennino repository highlights it as “Arduino like with RFM69 module.”
Why this matters:
- Sub-GHz signals often travel farther than 2.4 GHz Wi-Fi/Bluetooth in real environments
- RF telemetry can be simpler and more robust for low-bandwidth sensor networks
- The power profile is typically far more battery-friendly than Wi-Fi
3) Low-Power Design (Sleep-First Architecture)
Antennino is intentionally designed for low power operation, emphasizing modes where the node spends most of its time asleep and wakes briefly to transmit. Open-Electronics highlights Antennino as low cost and low power, with OTA programming capabilities.
This approach is essential for remote deployments where:
- you can’t recharge often
- you can’t run a cable
- you need stable performance for months/years
4) OTA (Over-The-Air) Programming Capability
One of the most valuable features mentioned in the Open-Electronics series is OTA programming, meaning firmware updates can be pushed wirelessly without physically accessing the board.
This is a huge advantage for:
- nodes placed high on walls/ceilings
- outdoor sensors sealed in enclosures
- remote stations in fields, basements, or rooftops
5) Peripheral or Gateway Modes
Antennino can be used as a sensor node (Peripheral) or as part of a Gateway setup, enabling a network architecture where many nodes talk to a central collector. Open-Electronics describes Antennino operating in both Peripheral and Gateway mode.
This architecture is common in real-world IoT because it:
- avoids needing every node to have internet connectivity
- makes the system easier to scale
- centralizes data handling and cloud integration
Antennino vs ESP32 vs Arduino Uno: Which One Should You Pick?
This is the question most makers ask, and it comes down to one factor: power vs connectivity vs simplicity.
Choose Antennino if you need:
- long-range sensor communication without Wi-Fi
- low power consumption and long battery life
- stable node-to-gateway networks
- OTA updates for remote deployments
Choose ESP32 if you need:
- built-in Wi-Fi and Bluetooth
- faster processing and more RAM
- direct cloud connectivity
- multimedia or heavy sensor processing
Choose Arduino Uno if you need:
- pure beginner simplicity
- no wireless connectivity required
- small lab prototypes without battery constraints
A simple rule:
If your device must live on a battery in the real world, Antennino is often the better default.
How Antennino Works
Antennino is built around a low-power telemetry rhythm:
- Sleep most of the time
- Wake up briefly
- Read sensor data
- Transmit a short packet
- Go back to sleep
This rhythm allows months-long battery life, because energy is only used in brief bursts, not continuously.
This is very different from Wi-Fi boards that often maintain network stacks, scan routers, keep connections alive, and burn power even when “idle.”
Real-World Scenarios Where Antennino Shines
Scenario 1: Smart Agriculture Moisture Monitoring
A farm deploys 30 soil sensors across a large area. Each node sends moisture and temperature data every 10 minutes. Wi-Fi doesn’t cover the field, and cellular would be expensive.
With Antennino:
- each node transmits low-bandwidth readings to a gateway
- batteries last far longer due to low-power design
- the gateway can push data to the cloud via one internet connection
This is one of the most practical and cost-effective architectures for agriculture IoT.
Scenario 2: Home Automation Without Wi-Fi Congestion
Wi-Fi-based sensors can clutter a home network and drain batteries quickly. Antennino nodes can handle:
- door sensors
- temperature sensors
- motion sensors
- leak detectors
while transmitting to a single gateway, keeping your Wi-Fi network clean and reducing maintenance.
Scenario 3: Environmental Monitoring in Remote Areas
For weather stations, river level monitoring, or air quality sensors, Antennino’s low-power architecture and OTA capability become extremely valuable. It can operate as part of a sensor mesh or point-to-gateway system while remaining easy to update.
Antennino Setup Guide (Beginner-Friendly Overview)
Step 1: Treat It Like an Arduino (Because It Is)
Antennino is Arduino IDE compatible, so the workflow is familiar. Install the Arduino IDE, connect your programmer/interface, and verify board settings based on Antennino documentation.
Step 2: Use the Antennino Repository and References
The open-source GitHub project is a good starting point to explore how the board is structured and what firmware patterns it supports.
Step 3: Start With a Simple “Hello RF” Transmission
Before building a full sensor node:
- test a basic radio packet send
- confirm the gateway can receive
- verify range and reliability
- only then integrate sensors and power optimization
Actionable Low-Power Tips (Make Antennino Last Longer)
Even though Antennino is designed for low power, your code determines battery life.
Tip 1: Keep Transmissions Short and Infrequent
Transmit only what you need. Reduce payload size. Avoid frequent sends unless necessary.
Tip 2: Use Sleep Aggressively
The best low-power system is the one that sleeps 99% of the time.
Tip 3: Disable Unused Peripherals
If you don’t need ADC always on, disable it between reads. Same for timers or LEDs.
Tip 4: Test With Real Batteries Early
Bench power supply results can mislead. Real batteries reveal true drain patterns.
Antennino Gateway + ThingsBoard: A Modern Dashboard Approach
One of the most powerful Antennino workflows is using a gateway to bridge RF sensor data into a dashboard like ThingsBoard. Open-Electronics specifically describes building a ThingsBoard dashboard to manage telemetry from Antennino sensor nodes.
In practice, this architecture works like:
- Multiple Antennino nodes collect data
- Gateway receives RF transmissions
- Gateway forwards to ThingsBoard via MQTT/HTTP
- Dashboard displays real-time readings, history, alerts
This is what makes Antennino “real IoT” rather than just a hobby board — it can scale into professional telemetry systems with the right gateway design.
Common Questions People Ask About Antennino
What is Antennino used for?
Antennino is used for low-power wireless IoT projects such as remote sensors, home automation nodes, smart agriculture monitoring, and telemetry systems where battery life and long-range communication matter most.
Is Antennino compatible with Arduino IDE?
Yes. Antennino is Arduino IDE compatible, making it accessible to makers who already know Arduino programming and libraries.
Does Antennino support OTA updates?
Yes. Antennino supports OTA (over-the-air) programming, allowing firmware updates without physically accessing the device — especially valuable for remote installations.
What wireless frequency does Antennino use?
Antennino is commonly associated with sub-GHz RF modules like RFM69, which may operate at 433 MHz, 868 MHz, or 915 MHz depending on region and configuration. (Always follow your local RF regulations.)
Antennino Buying & Project Planning Considerations
Before committing to Antennino in a project, confirm these points:
1) Regional RF Regulations
Sub-GHz frequencies vary by country. What’s legal in Europe (868 MHz) may differ from North America (915 MHz) or other regions.
2) Gateway Strategy
Antennino’s biggest strength is in networks, not isolated nodes. Plan your gateway early.
3) Power Budget
Battery life depends on:
- sensor current draw
- transmission interval
- RF power settings
- sleep implementation quality
Conclusion: Is Antennino Worth It?
If your goal is to build battery-powered IoT devices that communicate reliably without the complexity of Wi-Fi, then Antennino is one of the most practical Arduino-compatible solutions you can choose. Its low-power design philosophy, RF-based wireless communication, OTA programming capability, and gateway-ready architecture make it especially valuable for real-world deployments — far beyond quick desk prototypes.
In short:
Antennino is not about speed. It’s about endurance, reliability, and simplicity.
And for IoT, that’s often exactly what you need.
FAQs
Can Antennino connect directly to the internet?
Not typically. Antennino is designed for RF node-to-gateway communication. A gateway can then connect to the internet to upload data.
Is Antennino good for beginners?
Yes — especially if you already know Arduino basics. The biggest learning curve is understanding RF networks and power optimization.
What makes Antennino better than Wi-Fi boards for sensors?
For sensor nodes, Antennino often wins because it can run much longer on batteries and can communicate over longer distances without needing Wi-Fi coverage.
Can Antennino be used for smart home projects?
Yes. Antennino works well for smart home sensors and automation nodes, especially when you want to avoid Wi-Fi congestion and frequent battery replacement.