Shooting on a 16mm Movie Camera is one of the most satisfying ways to learn “real” cinematography. You feel every step: loading film, setting exposure, hearing the camera whir, and finally seeing those grainy, cinematic images on screen.
- What Is 16mm Film and a 16mm Movie Camera?
- Suggested Image for the Article
- 16mm Film Basics: Gauge, Frame Size & Run Time
- Gear Checklist: What You Need Before Loading
- Preparing to Load Your 16mm Movie Camera
- Loading a 16mm Movie Camera with Daylight Spools
- Loading a 16mm Movie Camera Magazine (400 ft)
- Setting Exposure on a 16mm Movie Camera
- Focusing, Framing & Checking the Gate
- Shooting Workflow: From First Slate to Last Take
- After the Shoot: Unloading and Storing Exposed Film
- Common Mistakes When Setting Up a 16mm Movie Camera
- FAQ: 16mm Movie Camera Setup & Film Loading
- Conclusion: Why Learning a 16mm Movie Camera Still Matters
This guide walks you through a complete 16mm movie camera setup – from choosing and loading film to exposing, shooting, and unloading – so you can go from nervous first-timer to confident operator.
What Is 16mm Film and a 16mm Movie Camera?
16mm film is an analogue motion picture format that’s 16 millimetres wide. It was introduced by Kodak in the 1920s as a more economical alternative to 35mm and became hugely popular for documentaries, television and low-budget features.
A 16mm Movie Camera is any motion picture camera designed to expose that 16mm-wide film. You’ll see:
- Clockwork and spring-wound cameras (e.g., Bolex, Bell & Howell)
- Professional sync-sound cameras (e.g., Arriflex SR, Aaton XTR, Eclair ACL) used for TV and indie features
These cameras all do the same basic job: pull 16mm film behind a lens, expose it frame by frame, and keep everything steady enough to project or scan later.
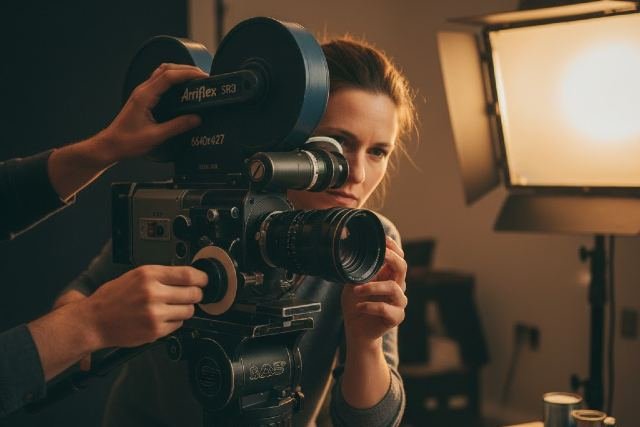
Suggested Image for the Article
- File name:
16mm-movie-camera-loading-film-setup.jpg - Alt text:
Filmmaker loading 16mm film into a 16mm Movie Camera on set
Use this as a hero image near the top of the page for better engagement and image SEO.
16mm Film Basics: Gauge, Frame Size & Run Time
Understanding a few technical basics will make the rest of your 16mm Movie Camera setup much easier.
Film gauge and image area
- Gauge: 16mm refers to the physical width of the film strip.
- Frame size: The picture area of standard 16mm is roughly 10.26 mm × 7.49 mm, smaller than 35mm but big enough for detailed, filmic images.
- Perforations: 16mm can be single-perf or double-perf; Super 16 uses single-perf to widen the image.
How long does a roll last?
A big part of 16mm shooting is time awareness.
| Roll Length | Type | Approx. Run Time at 24 fps* |
|---|---|---|
| 50 ft | Daylight spool | ~1 minute |
| 100 ft | Daylight spool | ~2.5–3 minutes |
| 400 ft | Camera magazine | ~10–11 minutes |
*400 ft of 16mm film runs for about 11 minutes at 24 fps according to common technical specs.
Knowing your run time helps you plan shots, call “reloads” at the right moment, and avoid running out mid-take.
Gear Checklist: What You Need Before Loading
Before you touch any film, make sure you have a complete 16mm camera kit ready:
- 16mm Movie Camera body (e.g., Bolex, Arri SR, Aaton, Bell & Howell)
- Lens or lens set (often C-mount or PL mount)
- Film stock (e.g., Kodak Vision3 16mm negative, daylight or tungsten)
- Batteries or fully wound spring
- Empty take-up spool (for daylight spool cameras) or empty magazine
- Light meter (incident or spot)
- Tripod / support
- Lens cleaning kit (blower, brush, cloth)
- Gaffer’s tape, Sharpie, camera tape for labeling mags and rolls
- Changing bag or darkroom (highly recommended, even with daylight spools)
If you’re building a resource hub, this is a great place to add internal links like [Beginner’s Guide to Film Cameras] or [How to Choose 16mm Film Stock].
Preparing to Load Your 16mm Movie Camera
Loading is the step most beginners fear – but once you’ve done it a couple of times, it becomes a calm, repeatable ritual.
1. Choose the right environment
- Ideally, load in a changing bag or darkroom to avoid fogging the film.
- For daylight spools, you can load in subdued light, but avoid direct sun. Daylight spools are designed so only the outer wraps get minimal fogging while the inner layers stay protected.
2. Prepare the camera or magazine
- Switch the camera OFF or ensure the spring is not wound.
- Open the camera door or magazine lid.
- Check the film path (rollers, sprockets, pressure plate) for dust or bits of old film.
- Prepare the take-up side (empty spool or take-up core) so you’re not fumbling later.
Loading a 16mm Movie Camera with Daylight Spools
This is common with cameras like Bolex H16 or Bell & Howell 70 series.
Step-by-step: Daylight spool loading
- Open the film can
- In low light or inside a changing bag, open the 100 ft can.
- Identify the feed spool (fresh film) – it should be labelled and wound emulsion-in.
- Mount the feed spool
- Place it on the feed spindle (often the left side).
- Make sure it spins the correct way so film feeds emulsion towards the lens.
- Thread the film path
- Pull out 30–40 cm of film.
- Follow the diagram inside the camera door: over/under rollers, around sprockets, past the gate.
- Create the recommended loops above and below the gate (many 16mm cameras specify loop size inside the door).
- Attach to the take-up spool
- Insert the film leader into the take-up spool slot.
- Wind a few turns to secure it.
- Check alignment and loops
- Double-check that the film perforations sit correctly on the sprockets.
- Confirm the loops are not too tight or too large (wrong loops cause jitter or jamming).
- Close the door and run a short test
- Close the camera, lock it, then run the motor for 1–2 seconds.
- Listen for smooth, consistent sound – no scraping, grinding, or fluctuating speed.
Pro tip
Always label the camera body with the stock type, ISO/ASA, and roll number. This makes exposure and post-production tracking much easier.
Loading a 16mm Movie Camera Magazine (400 ft)
Sync-sound cameras like the Arriflex 16SR or Aaton XTR use detachable magazines that take 400 ft rolls or 100 ft daylight rolls on cores.
Step-by-step: Magazine loading (in a changing bag or darkroom)
- Open the magazine
- Separate the feed side and take-up side or open the hinged lid.
- Check all rollers and gears are clean.
- Mount the feed roll (fresh film)
- Place the 400 ft roll on the feed core (emulsion in).
- Secure it with the core adapter/retainer.
- Thread through the throat
- Pull film along the marked path, through the throat or loop formers.
- Some mags have loop formers that set perfect loop size automatically.
- Attach to take-up core
- Feed the leader into the take-up core or onto a take-up spool.
- Wind several turns by hand.
- Close and latch
- Close both sides firmly to prevent light leaks.
- On some systems, you can run the mag on a “dummy body” or test bench to check for smooth pulling.
- Mount the magazine on the camera
- Once out of the dark, mount the mag on the camera and engage the drive.
- Run a quick test while listening for steady movement.
Again, label stock type, ISO, roll number, and “EXPOSED” on mags when you unload them after shooting.
Setting Exposure on a 16mm Movie Camera
Film is less forgiving than digital when you wildly miss exposure, so this step matters.
Frame rate and shutter angle
Most 16mm cameras shoot at 24 fps for sync sound or 25 fps in PAL regions, with a shutter angle around 172.8°–180°.
The classic 180-degree shutter rule says your shutter speed should be roughly double your frame rate:
- 24 fps → ~1/48 s (often rounded to 1/50 s)
- 25 fps → 1/50 s
This creates natural motion blur similar to what audiences expect from traditional cinema.
Using a light meter with 16mm film
- Set the meter ISO to match your film stock (e.g., 250D, 500T).
- Set the shutter speed to match your frame rate/shutter angle (e.g., 1/50 s for ~180° at 24–25 fps).
- Take an incident reading (meter pointed at the camera) or spot reading of key tones in your scene.
- Dial the recommended f-stop on your lens.
If your camera allows changing the shutter angle, remember that a smaller angle (e.g., 90°) requires more light or a wider aperture; a larger angle (e.g., 220°) needs less.
Focusing, Framing & Checking the Gate
Focus and depth of field
- Always set critical focus on the eyes (for people) or the most important detail.
- Use the lens’s distance scale and marks – film cameras were built for precise, repeatable focus pulls.
- Stopping down to T4–T5.6 on 16mm gives a comfortable depth of field while staying sharp.
Framing and viewfinder
Different 16mm cameras have:
- Reflex viewfinders (you see almost exactly what hits the film).
- Side finders or external viewfinders (less precise, but usable).
If you’re shooting Super 16, make sure your finder and framing lines match the wider aspect ratio (around 1.66:1).
Checking the gate
A classic film set ritual is “check the gate”:
- After a critical take, unload the camera side or swing open the gate.
- Use a loupe and light to examine the gate for hairs, dust, or scratches.
- Clean gently with a puffer or soft brush if needed.
This prevents ruined footage due to debris scratching or blocking the image.
Shooting Workflow: From First Slate to Last Take
Here’s a simple on-set workflow for shooting with a 16mm Movie Camera.
- Roll call
- Confirm roll number, stock, and scene/shot with your script supervisor.
- Slate
- Clap a slate or clapperboard clearly visible in frame for sync and organisation.
- Roll camera
- AC or operator calls: “Rolling!”
- Director (or AD) waits for speed, then calls “Action!”
- Monitor performance and sound
- Listen for any change in camera sound that might indicate a jam or low battery/spring.
- Keep an eye on footage counter for remaining film.
- Cut and note
- After “Cut!”, record take number, good/bad, and notes (e.g., “soft focus,” “boom in frame”).
- Mag/roll change
- When close to the end of the roll, call for a reload break.
- Unload exposed film and label it immediately: “EXPOSED – Roll 3 – 500T – 24 fps – Date”.
After the Shoot: Unloading and Storing Exposed Film
Treat exposed film like gold.
- Unload in low light or a changing bag, especially for daylight spools.
- Put the roll back in its black bag and can, or use light-tight cores and cans for 400 ft.
- Label with project name, roll number, stock, date, and “EXPOSED”.
- Store in a cool, dry place until delivery to the lab – most labs recommend chilled storage for best image quality.
Kodak and other film manufacturers emphasize correct handling and storage to maintain image stability and avoid fogging.
Common Mistakes When Setting Up a 16mm Movie Camera
Avoid these classic beginner errors:
- Incorrect loop size → jitter or jams
- Wrong emulsion direction → poor pressure and possible scratching
- Forgetting to set ISO on the meter → consistent over/under exposure
- Not checking the gate → whole roll ruined by a single hair
- Mislabelled rolls → confusion at the lab or in post
Build a simple checklist you run before each roll to minimise risk.
FAQ: 16mm Movie Camera Setup & Film Loading
1. Is 16mm film still used today?
Yes. While digital dominates, 16mm is still used for art films, music videos, commercials, and education, valued for its texture and smaller, more affordable cameras compared to 35mm.
2. How hard is it to load a 16mm Movie Camera?
It feels intimidating at first, but with a clear diagram, changing bag, and practice, loading becomes routine. Many guides and videos demonstrate loading specific models like Bolex or Bell & Howell step by step.
3. Can I learn cinematography on 16mm and still work in digital?
Absolutely. The fundamentals you practice on a 16mm Movie Camera – exposure, composition, focus, camera movement, and discipline with takes – translate directly to digital cameras.
4. How do I choose the right 16mm film stock?
Consider:
- Speed (ISO): 50–250 for bright exteriors, 500 for low light
- Colour vs B&W
- Daylight vs tungsten balance
Manufacturers like Kodak publish detailed data sheets on latitude, contrast, and recommended processing for each stock.
5. How much footage do I need for a short film?
As a rough rule, plan 3–5 times your final runtime in raw footage. For a 5-minute short at a 3:1 shooting ratio, you’ll need about 15 minutes of film – roughly two 400 ft rolls of 16mm at 24 fps.
Conclusion: Why Learning a 16mm Movie Camera Still Matters
Setting up a 16mm Movie Camera – from loading the film and threading the gate to metering, framing, and finally calling “Action” – forces you to slow down and think like a cinematographer. Every decision costs real feet of film, so you naturally develop better planning, shot discipline, and respect for the image.
Even in a digital-first world, the skills you learn here make you more confident on any camera, and the look of properly exposed 16mm remains timeless. If you follow the steps in this 16mm movie camera setup guide, build good habits around loading, exposure, and labeling, you’ll be ready to shoot film with the same calm, professional approach that crews have relied on for decades.
And when your first processed roll comes back from the lab, grain dancing across the frame, you’ll know every click, wind and meter reading you made with that 16mm Movie Camera was worth it.